联想笔记本的 Debian 之旅
Debian 11 Bullseye 已正式发布,借此机会整理了一下关于 Bullseye 在笔记本上的安装记录,遇到的主要问题是:无线网卡驱动、触摸板手势、电源管理
1. 准备 Debian 安装盘
首先到 Debian 官网 下载网络安装镜像 debian-11.0.0-amd64-netinst.iso
- 制作 Ventoy 启动U盘
Ventoy 的便利性这里不做赘述,下载最新版 Ventoy2Disk 一键制作启动盘
然后将刚在下载的 ISO 文件拷贝到U盘根目录下面
- 无线网卡固件
博主的笔记本是没有有线网卡的,首先需要下载网卡 固件文件 驱动无线网卡,可以根据自己的网卡型号选择不同的固件,博主为了安装黑苹果,已经将笔记本自带的无线网卡更换为 D1830A,此处使用的是博通的固件
| 厂商 | 固件 | 文档 |
|---|---|---|
| 英特尔(Intel) | firmware-iwlwifi | https://wiki.debian.org/iwlwifi |
| 博通(Broadcom) | firmware-brcm80211 | https://wiki.debian.org/brcmfmac |
| 瑞昱(Realtek) | firmware-realtek | |
| 高通(Atheros) | firmware-atheros |
使用 ar x firmware-xxx.deb 命令解压得到 data.tar.xz 得到固件压缩包。
下面使用 Ventoy 文件注入插件 把固件文件注入到安装盘中,
编辑 U盘中的 ventoy\ventoy.json 为如下内容
{
    "injection": [{
        "image": "/debian-testing-amd64-netinst.iso",
        "archive": "/firmware-brcm80211.tar.xz"
    }]
}
重启电脑按 F12 进入启动选单,选择 EFI USB Device 即可进入 Ventoy 启动界面
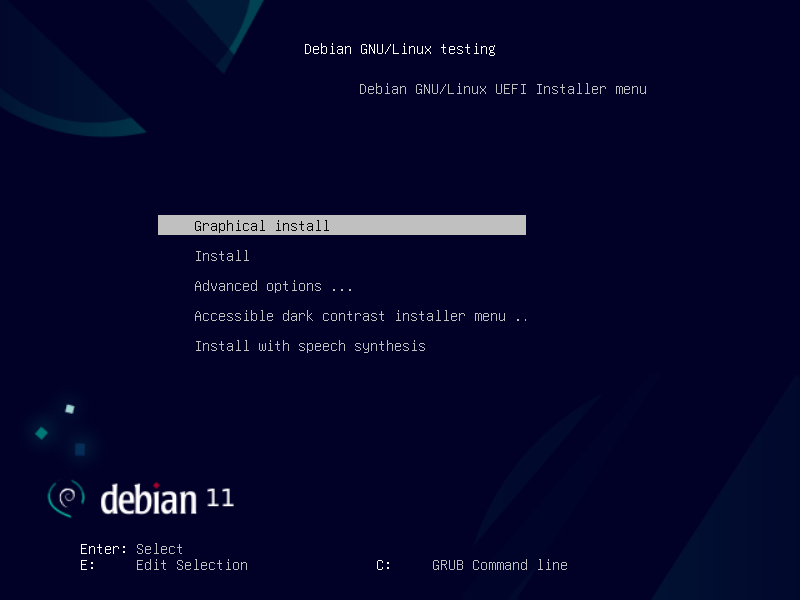
2. Debian 安装
安装器的语言选择 简体中文
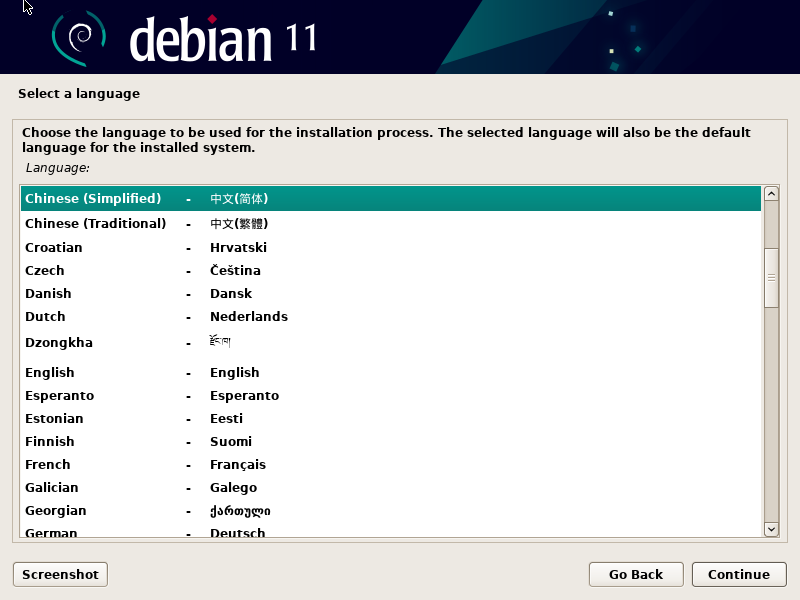
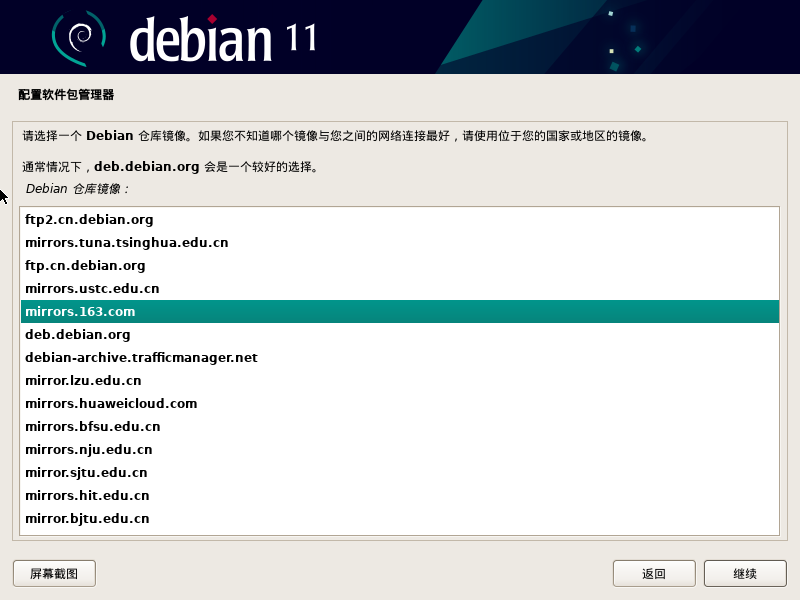
2.1 最小化桌面安装
Debian 可以搭配多种 桌面环境 安装,大多数时候在选择组件时候勾选其中一项桌面环境即可,如果不是折腾党可以跳过此节。
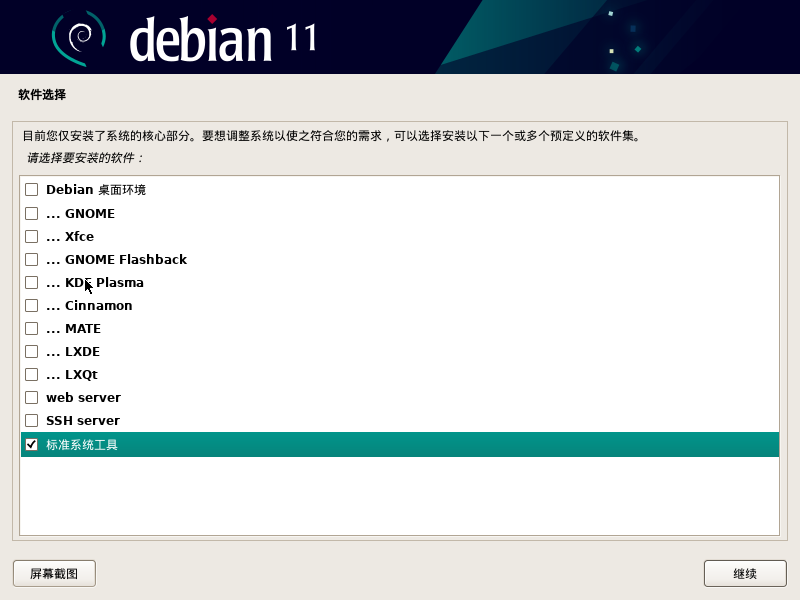
由于通过 tasksel 安装的桌面环境会预安装 浏览器、播放器、libreoffice等组件,虽然可以事后通过 sudo apt purge -y libreoffice? firefox-esr h3v 命令卸载,但是作为重度强迫症患者实在不能忍。
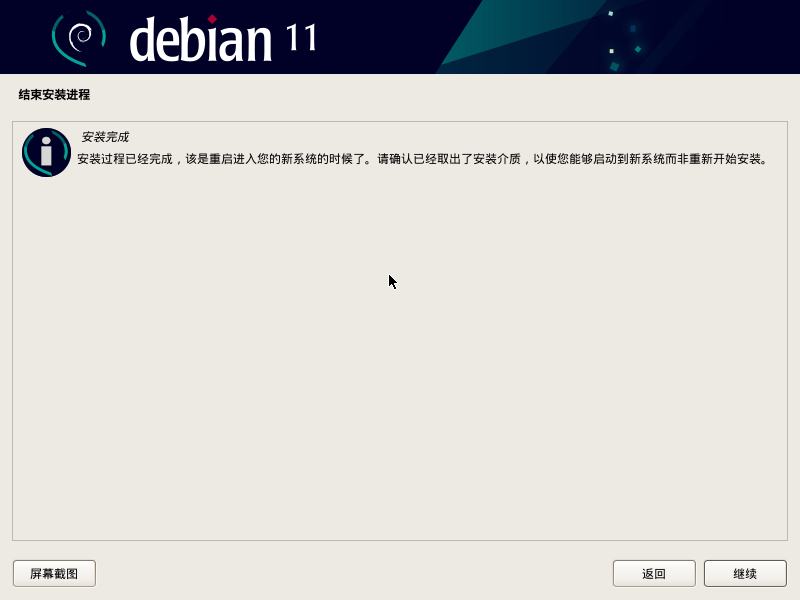
当安装程序提示完成的时候,不要重启,按 Ctrl+Alt+F2 快捷键输入以下命令,然后安装桌面必要组件以及网络管理器
mount /dev/pts /target/dev/pts
chroot /target bash

sudo sed -i 's/bullseye main/bullseye main contrib non-free/g' /etc/apt/sources.list
sudo sed -i 's/security.debian.org/mirrors.163.com/g' /etc/apt/sources.list
sudo apt update
XFce 桌面环境 sudo apt install -y xfce4 network-manager-gnome fonts-wqy-zenhei
LXDE 桌面环境 sudo apt install -y lxde-core connman-ui fonts-wqy-zenhei
LXQt 桌面环境 sudo apt install -y sddm lxqt-core lxqt-admin cmst fonts-wqy-zenhei
Cinnamon 桌面环境 sudo apt install -y cinnamon-core
Budgie桌面环境 sudo apt install gdm3 budgie-desktop budgie-network-manager-applet fonts-wqy-zenhei
安装过程中可以通过Ctrl+Alt+F2组合键进入中断,Ctrl+Alt+F1返回安装界面
2.2 系统固件配置
- Intel 显卡固件 下载后复制到
/lib/firmware/i195目录中 - 博通蓝牙固件
- 配置 HiDpi
cat > ~/.Xresources << EOF
Xft.dpi: 130
EOF- 处理 Wifi 显示 “设备未托管” 问题
修改 /etc/NetworkManager/NetworkManager.conf 将 managed=false 改为 managed=true
2.3 配置触摸板多指手势
LXQt 桌面的用户可以通过开始菜单中的 首选项 -> LxQT 设置 -> 键盘与鼠标 中的 鼠标与触摸板 配置多指手势。但是LXDE 的用户就没有这么方便了,可以通过配置 libinput 的方法达到效果
运行 sudo apt install -y xserver-xorg-input-libinput 安装 Libinput
编辑 /usr/share/X11/xorg.conf.d/40-libinput.conf 修改如下内容
Section "InputClass"
        Identifier "libinput touchpad catchall"
        MatchIsTouchpad "on"
        MatchDevicePath "/dev/input/event*"
        Driver "libinput"
        Option "Tapping" "true"
        Option "NaturalScrolling" "true"
        Option "TapButton1" "1"
        Option "TapButton2" "2"
        Option "TapButton3" "3"
EndSection
重启后即可使用触摸板的 轻点、双指右键等功能
2.4 升级内核
运行 sudo apt edit-sources 将如下内容添加到最后
deb http://mirrors.163.com/debian/ bullseye-backports main
deb-src http://mirrors.163.com/debian/ bullseye-backports main
安装内核文件
sudo apt -t bullseye-backports install -y linux-image-amd64- 免密 sudo
echo "$USER ALL=(ALL) NOPASSWD:ALL" | sudo tee /etc/sudoers.d/90-cloudimg3. 应用安装
3.1 Google Chrome 浏览器
wget https://dl.google.com/linux/direct/google-chrome-stable_current_amd64.deb
sudo apt install -y ./google-chrome-stable_current_amd64.deb
3.2 良心国产 Linux 应用
WPS Office for Linux 是由金山软件股份有限公司自主研发的一款办公软件套装,可以实现办公软件最常用的文字、表格、演示等多种功能。具有内存占用低、运行速度快、体积小巧、强大插件平台支持、免费提供海量在线存储空间及文档模板。
3.3 Visual Studio Code 编辑器
curl https://packages.microsoft.com/keys/microsoft.asc | sudo gpg --dearmor -o /etc/apt/trusted.gpg.d/microsoft.gpg
echo "deb [arch=amd64] http://packages.microsoft.com/repos/code stable main" | sudo tee /etc/apt/sources.list.d/vscode.list
sudo apt install -y code- 个性化配置
选择 File -> Prefernces -> Setting,Window 下的 Title Bar Style 选择为 custom
- 编辑器字体
https://packages.debian.org/bullseye/ttf-mscorefonts-installer
修改 /etc/apt/source.list 增加 contrib
sudo apt install -y ttf-mscorefonts-installer 修改 editor.fontFamily 为 Courier New
3.4 开发相关
sudo curl -sL https://mirrors.163.com/docker-ce/linux/debian/gpg | sudo gpg --dearmor -o /etc/apt/trusted.gpg.d/docker.gpg
echo "deb [arch=amd64] http://mirrors.163.com/docker-ce/linux/debian $(lsb_release -cs) stable" | sudo tee /etc/apt/sources.list.d/docker-ce.list
apt update && apt install -y docker-ce
3.5 使用 Deepin Wine 安装 Windows 软件
- 修复 Debian 11 依赖
即将推出的 Debian Bullseye 中,由于 deepin-wine-plugin-virtual 所依赖的 python-dbus 和 python-gobject 两个基于 Python2.7 的包被砍掉了,所以没办法像 Debian 10 一样简单的补充一个 udis86 包就能解决依赖问题。Debian 10 用户可以只看下一节的 安装 Wine
此处采用了重新打包两个 deb 文件,将依赖重定向到 Python3 版本的方案
mkdir -p python-dbus/DEBIAN python-gobject/DEBIAN

cat > python-dbus/DEBIAN/control << EOF
Package: python-dbus
Version: 1.2.16-5
Architecture: all
Maintainer: Debian GNOME Maintainers
Depends: python3-dbus
Section: python
Priority: optional
Description: simple interprocess messaging system (Python interface)
EOF

cat > python-gobject/DEBIAN/control << EOF
Package: python-gobject
Version: 3.30.4-1
Architecture: all
Maintainer: Debian GNOME Maintainers
Depends: python3-gi
Section: python
Priority: optional
Description: Python 3 bindings for gobject-introspection libraries
EOF

dpkg -b python-dbus python-dbus.deb
dpkg -b python-gobject python-gobject.deb

sudo apt install -y ./python-*.deb- 安装 Wine
# 添加 Deepin 商店源
wget http://mirrors.163.com/deepin/pool/main/d/deepin-keyring/deepin-keyring_2021.06.07-1_all.deb
sudo apt install -y ./deepin-keyring_*.deb
echo "deb https://com-store-packages.uniontech.com/appstore eagle appstore" | sudo tee /etc/apt/sources.list.d/appstore.list

# 安装 x86 反汇编引擎
sudo dpkg --add-architecture i386
sudo apt update
wget http://mirrors.163.com/deepin/pool/non-free/u/udis86/udis86_1.72-4_i386.deb
sudo apt install -y ./udis86_*.deb

# 安装 Deepin-Wine5
sudo apt install -y deepin-wine-plugin-virtual

# 处理桌面快捷方式及图标
sudo tee "/etc/profile.d/deepin.sh" >/dev/null << "EOF"
XDG_DATA_DIRS=${XDG_DATA_DIRS:-/usr/local/share:/usr/share}
for deepin_dir in /opt/apps/*/entries; do
    if [ -d "$deepin_dir/applications" ]; then
        XDG_DATA_DIRS="$XDG_DATA_DIRS:$deepin_dir"
    fi
done
export XDG_DATA_DIRS
EOF- 安装 QQ 微信
sudo apt install -y com.qq.im.deepin com.qq.weixin.deepin
# 调整DPI
env WINEPREFIX="$HOME/.deepinwine/Deepin-QQ" $HOME/.deepinwine/deepin-wine5/bin/winecfg
env WINEPREFIX="$HOME/.deepinwine/Deepin-WeChat" /opt/deepin-wine6-stable/bin/winecfg
获取 deb 下载连接 apt install -y --print-uris $PACKAGE | cut -f 2 -d \' | grep \.deb
φ( ̄∇ ̄o)太赞了